![]()
Before I got my internship at Digital Dreams, I applied for multiple game design functions at several game companies. One of them liked my work, but specifically wanted to see if I could also do pixel art. So I tried just that, by taking some of my previous works and trying to pixelart-ize them. And to take it to the next level, I made a 3D version out of that pixel art work as well.
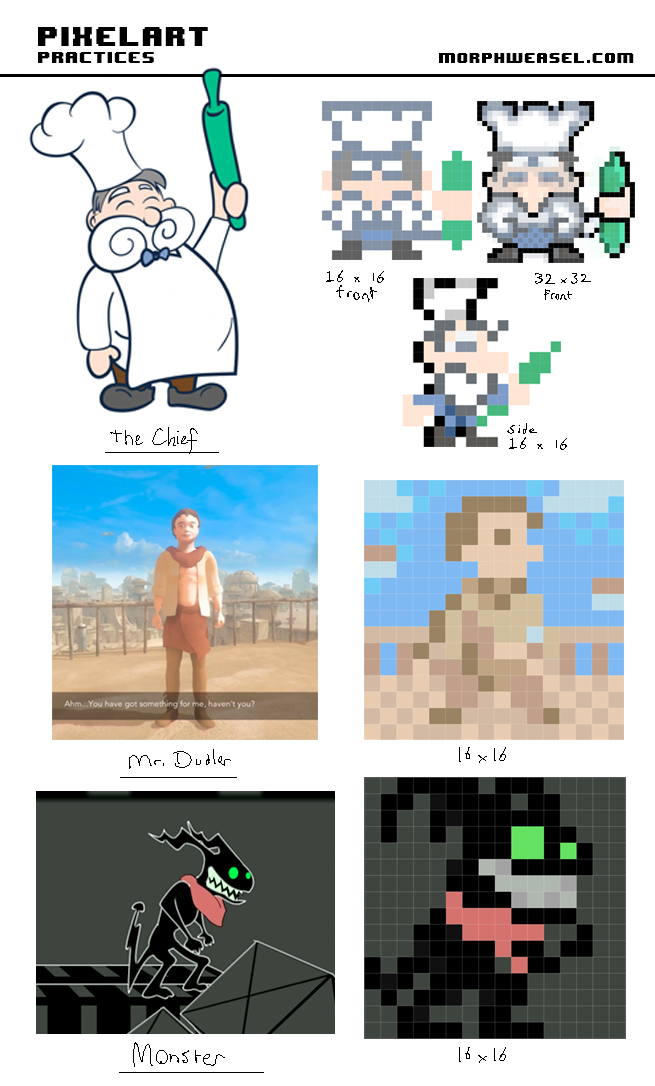
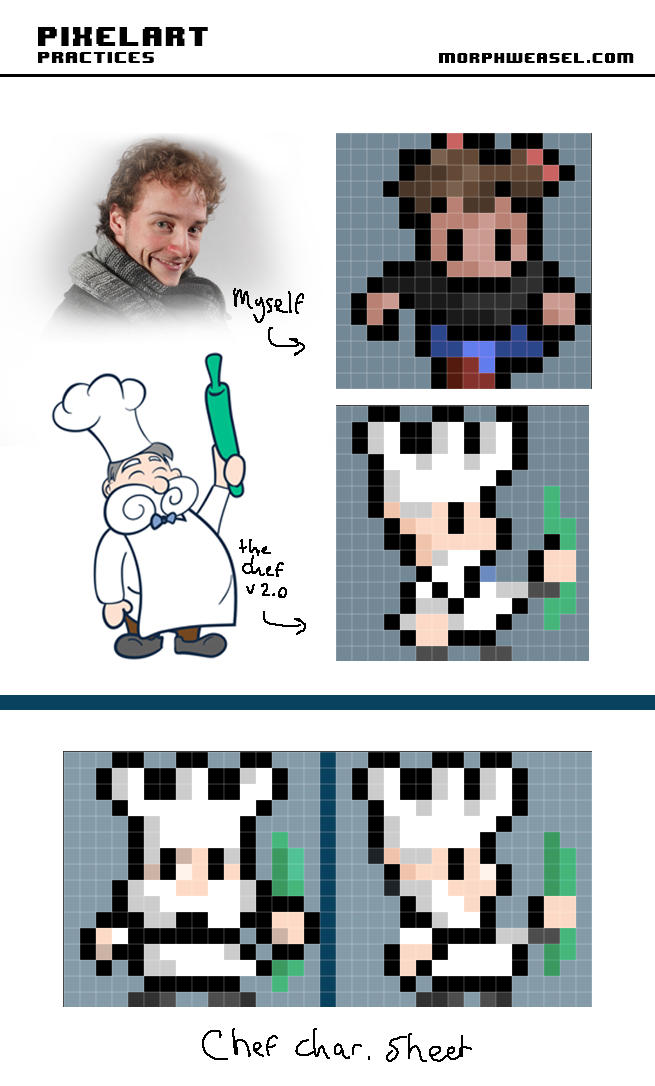
Below you can see some of my early attempts. I had a hard time of using just 16 by 16 pixels to get my results right. This tutorial helped me to get a basic understanding of pixel art terminology, but it was still hard to get it right. In the end this tutorial helped me a lot to get a better understanding of how making sprites and pixel art in general works. After getting the hang of making a sprite (that one guy should look like me… yeah, right), I went back to the Chef character and worked out his front- and sideviews. I kind of liked it, so I decided to use these images as references for its 3D version.
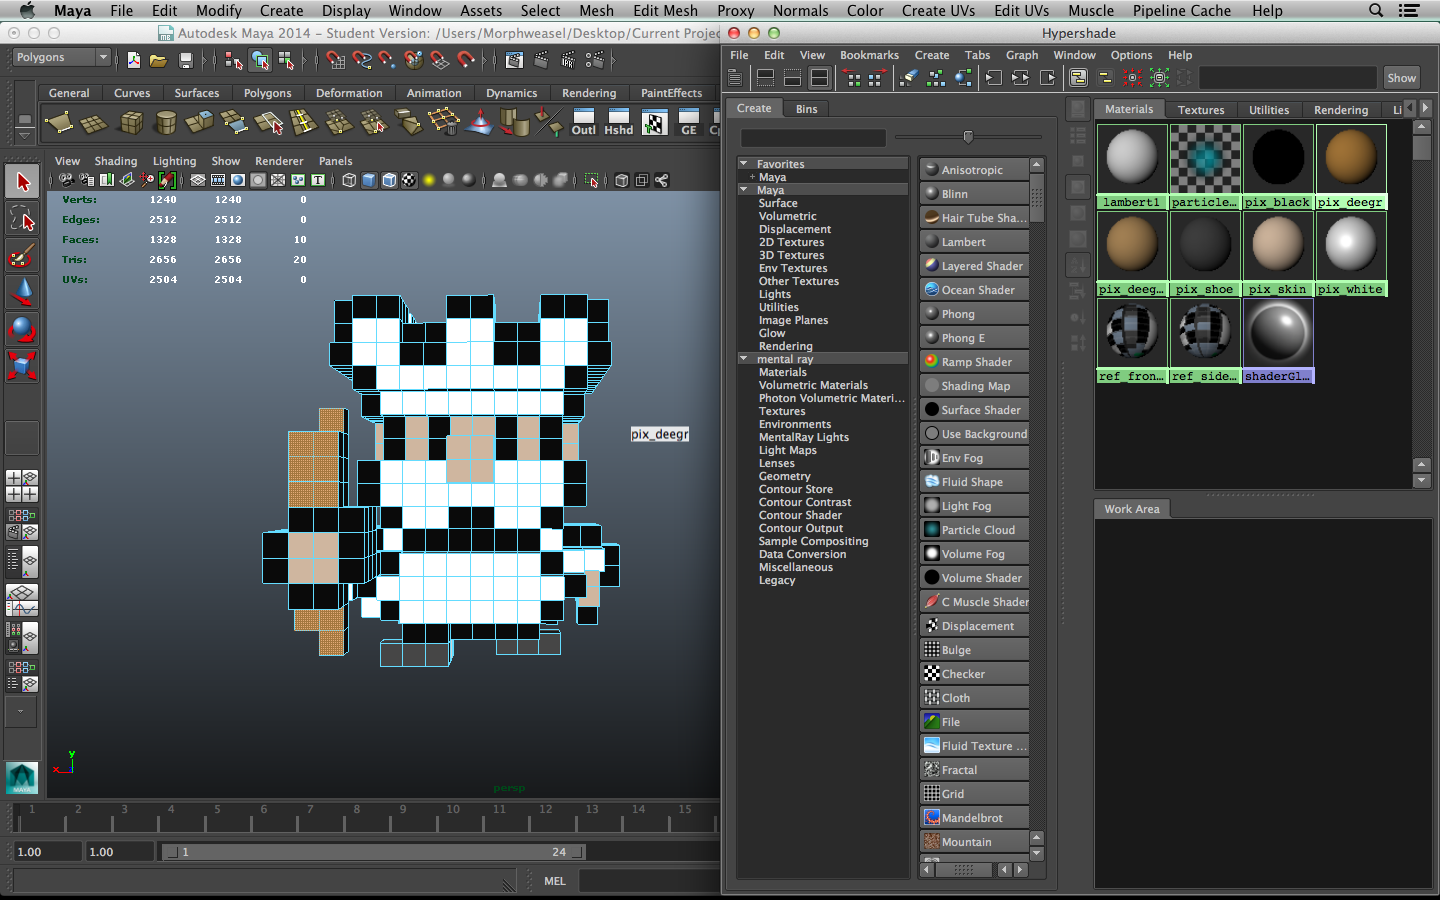
Once I had those images as reference planes in Maya, I had quite the struggle to actually make Chef Pixel in 3D. The result should look somewhat like the characters from 3D Dot Game Heroes, but where to start?
I kind of worked out the workflow by myself. First of all, it’s important that the grid is on and that the Extrude settings are set to 1 unit per extrude. This way, I could start in front view and extrude faces from a 1×1 block as much as needed to make it look like my 2D front view pixel art reference plane.
Once done, I extruded the whole thing a few times to fit the side view. Finally, it was a matter of looking at the model in 3D and deleting faces that aren’t needed from a certain angle and bridging/extruding/filling holes a lot. When extruding edges, make sure to snap to the grid or to other verts. This is a tedious last step, and I’ll try to immediately look at the model as 3D thing the next time I work on a project like this. That will also avoid a lot of cleaning up work afterwards.
Once the character was done, the fun part could begin: the coloring! Basically, I made a color palette in my Hypershade window. Each color that I used in 2D, would become a material with that same color properties in 3D. I then just selected the faces that needed to be a certain color, and apply the correct material to them. It helped to only work in the main colors first (skin, clothing, item, ec.) and afterwards apply the detail colors (skin highlight, cloth shadow, etc.)
In the end, the pixel art stuff helped me to get a job at the company. But I decided to go for the game design internship at Digital Dreams instead. First world problems.
Before I start at Digital Dreams, I still want to optimize When We Were One, so it won’t require a NASA PC to run it. I’m really busy with arranging a new place to live in Utrecht, but hopefully I’ll find the time to make the new build and post it here soon. I’ll also be attending the Global Game Jam 2015 next weekend, so expect some updates on that as well. Cheers!